What to Do After Purchasing Asset Tags
A guide walking you through the steps to maximize your asset tag investment, from receiving your tags to scanning and registering assets within Shelf.
Congratulations on purchasing Shelf asset tags! This guide walks you through the subsequent steps to maximize your investment and streamline the process of tagging and registering assets within the Shelf application.
Receiving Your Tags
Once your order is processed, you'll receive your asset tags through your chosen delivery method. Tags are typically delivered via mail in secure packaging to ensure they reach you in perfect condition. Delivery times may vary depending on your location and shipping method selected.

Preparing Your Workspace
For the smoothest workflow, we recommend creating your Shelf account before beginning the tagging process for your assets. During asset registration, you'll have the opportunity to specify the workspace where you'd like to register them. Choosing the right workspace is crucial to aligning Shelf with your specific needs and workflow.
Preparing Your Assets
Before sticking the tags onto your assets, it's important to prepare them properly. Start by cleaning and/or disinfecting the surface where the tag will be placed to ensure optimal adhesion. Additionally, consider how you store each asset and choose suitable areas for tag placement to ensure easy scanning and visibility.
Affixing the Tags
Affixing asset tags is a simple but permanent process. Peel off the backing and carefully stick the tag on the cleaned surface, pressing firmly to ensure a secure bond. The tags use a strong adhesive, making them durable but also hard to remove when secured.
Scanning and Registering Assets
Once your tags are placed and a suitable workspace has been created, it's time to scan and register your assets within the Shelf application. Using the camera app of your device or the built-in QR code scanner, simply scan the code on each tag to create a new asset that will be linked to the scanned QR code. A flow will be triggered in which you can easily register the asset and input relevant information such as asset name, category, description, location and more.
Registering Assets by Scanning Unclaimed Codes
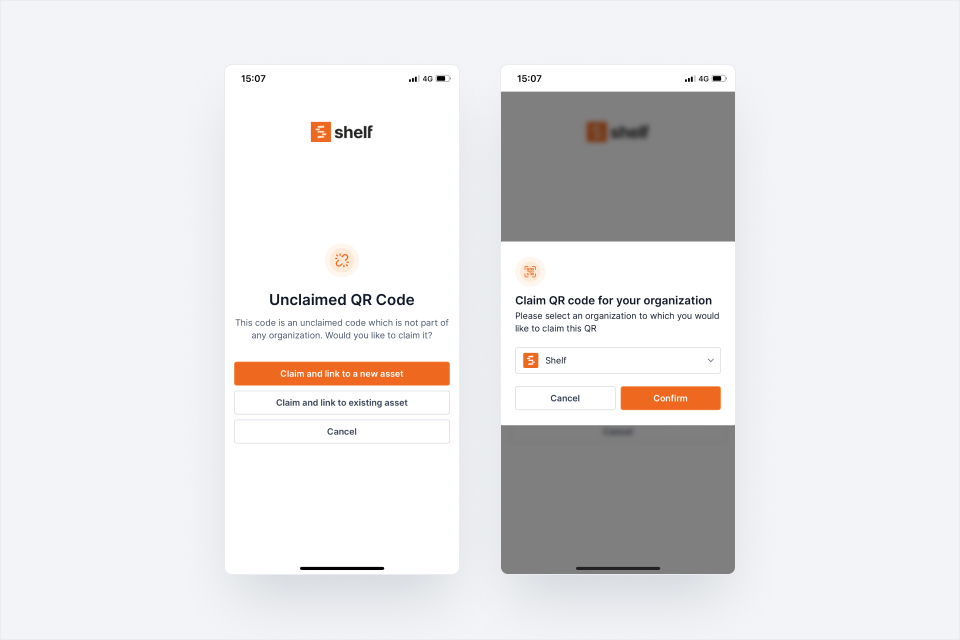
Here's the flow for registering new assets by scanning unclaimed codes:

- Peel off a QR code sticker and place it on an asset that you want to track within Shelf
- Scan the code with your preferred device by using the built-in scanner or the camera app
- You'll be prompted with a screen stating the scanned code is unclaimed
- Choose Claim and link to a new asset
- Make sure the preferred workspace is selected and choose Confirm
- Give your asset a Name and any other information
- Choose Save and the asset will be created
Linking Unclaimed Codes to Existing Assets
Alternatively, you can link unclaimed codes to assets that already exist in your database if needed. Simply choose Claim and link to existing asset and you'll be presented with your existing asset database. You'll then be able to choose an existing asset and replace the current linked QR code with the unclaimed code you've just scanned.
Conclusion
By following these simple steps, you'll be well on your way to efficient and streamlined asset management with asset tags and the Shelf application. If you have any questions or need further assistance, don't hesitate to reach out to our dedicated support team. Happy asset tracking!
Ready to try Shelf?
Put what you're learning into practice. Free plan available — no credit card required.