How to Generate a PDF Overview of Your Reserved Assets (Bookings)
The Shelf bookings feature enables users to pre-book assets from inventory and generate printable PDF overviews, which is valuable for event preparation and equipment loan tracking.
Generating a PDF of Your Booking / Reservation
The bookings feature allows you to pre-book assets from your available inventory. Whether you're preparing for a big event or just need to keep track of equipment loans, having a printable list can be incredibly useful. Here's how to generate a PDF overview:
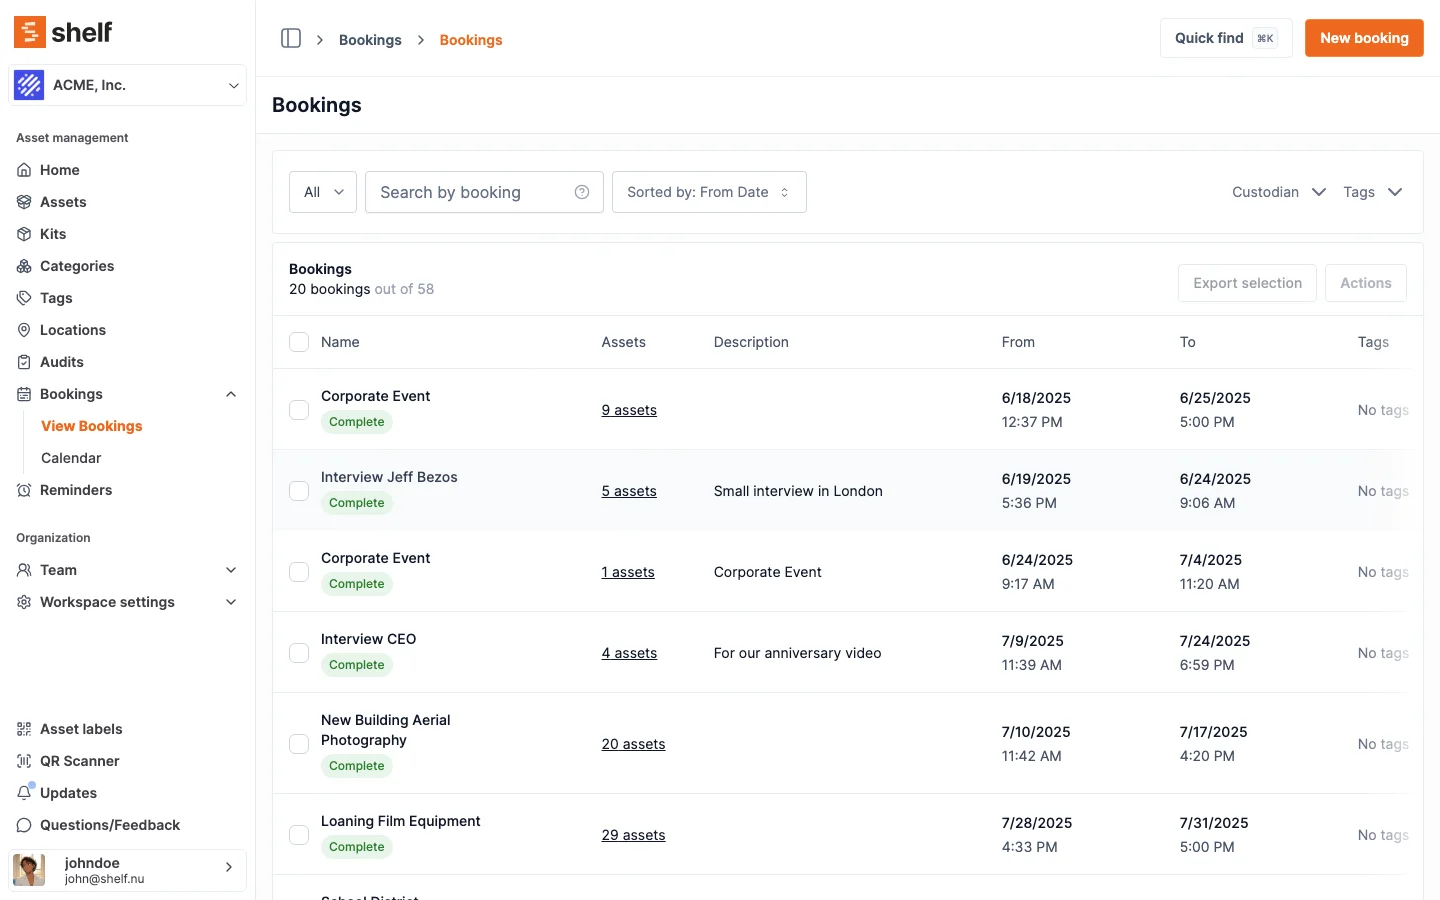
- Navigate to any booking in your Shelf account
- Open the Actions dropdown in the top right
- Choose Generate overview PDF
- The checklist opens as a preview. Click Download PDF to save it
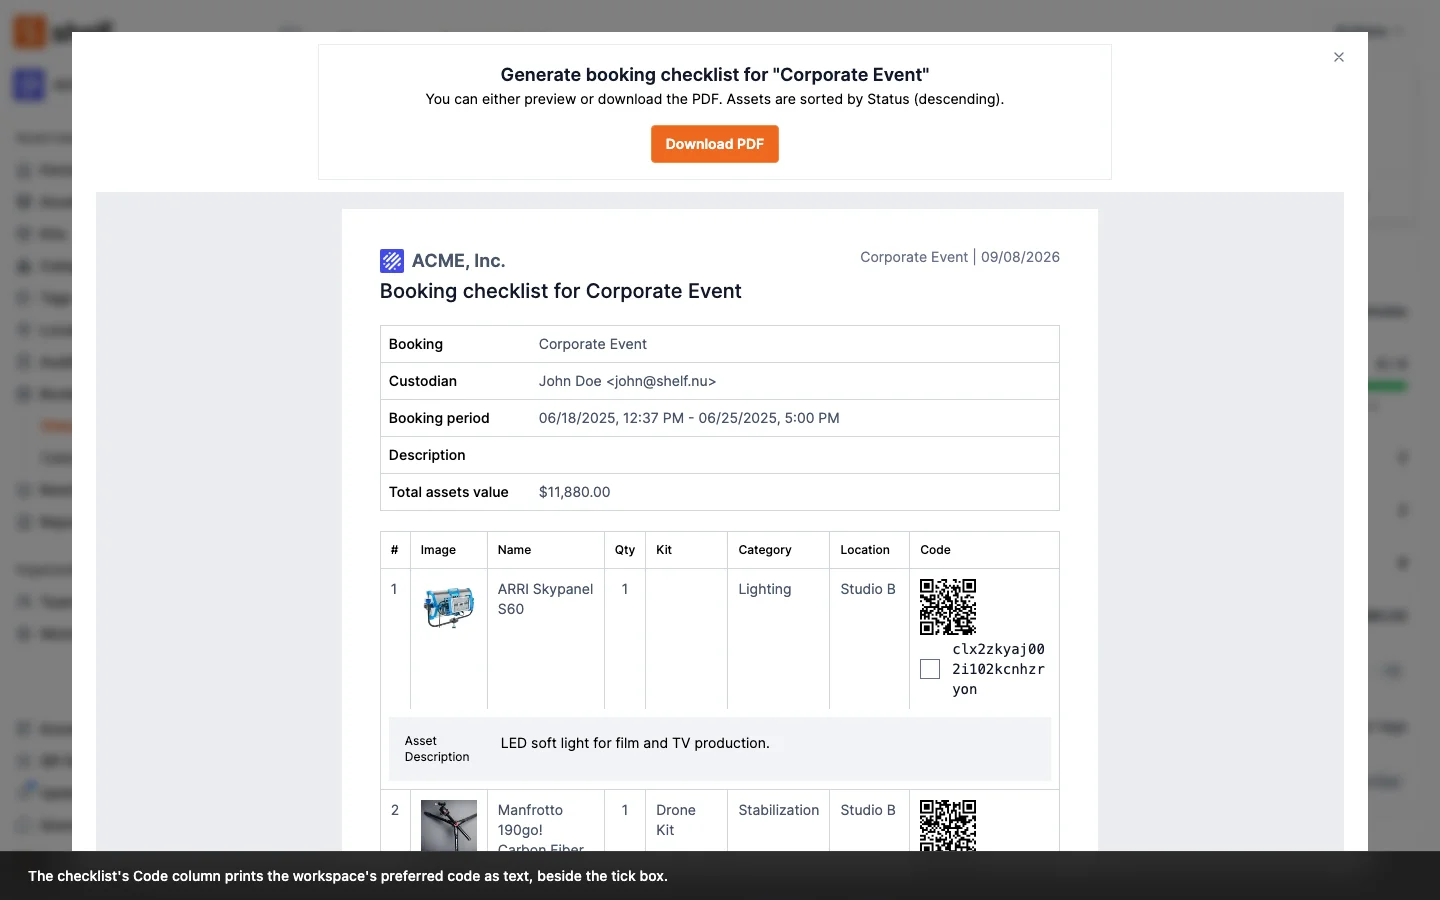
The preview's own subtitle tells you how the list is ordered, for example "Assets are sorted by Status (descending)."
Tip: The PDF respects the search you've applied to the booking's asset list. If you search the asset list first — by name, asset ID, category, location, tags, or code — the generated PDF includes only the matching items. On a large booking, this lets you print a focused pull list (for example, just the items stored in one location) instead of the full asset list.
When a match belongs to a kit, the whole kit comes into the PDF with it, exactly as it does on screen. Searching for one lens prints every item in the camera kit that lens belongs to, so a pull list never asks someone to fetch half a kit. The totals at the bottom count only what the PDF shows.
What's Included in the PDF?
When you generate a PDF, the server creates a comprehensive document containing:
- Workspace name
- Booking name
- Custodian responsible for the booking
- Booking period (start and end dates/times)
- Booking description
- The asset table, with a number, image, name, quantity, kit, category, location, and Code for every booked line
- Date of PDF generation
The Code Column
The last column of the asset table is headed Code, and it prints two things: a tick box, and the asset's code as text.
The code is whatever your workspace has chosen under Settings → General ▸ Preferred display code. A workspace set to SAM ID prints SAM-0042. A workspace on the default QR Code ID prints the QR id itself, which used to appear nowhere on the sheet. A workspace with the alternative-barcodes add-on set to Code 128, Code 39, DataMatrix, External QR or EAN-13 prints that barcode's value as text. There is no barcode image on the sheet, only the value, so this works for every preference rather than only the two free ones.
If an asset has no code of the preferred type, the sheet prints its QR Code ID and puts the type name underneath in small text, so a picker holding the paper can tell a fallback from the real thing. On screen that same explanation lives in a tooltip, and paper has no hover.
Because the code is printed, a sheet can be matched to a shelf by eye. Before this, a workspace whose physical labels carry SAM IDs got a sheet with a QR square and nothing readable on it.
Turning the QR image off
The QR square on the checklist is the same code as the sticker on the item. A phone cannot tell them apart, so scanning the sheet during a pack-out records a scan without anyone walking to the equipment, which is the opposite of what the scan is for.
If that matters to your team, an Owner or Administrator can switch the image off for the whole workspace:
- Open Settings → General.
- Find the QR codes on PDFs row, described as "Control whether the QR image is printed on the booking checklist and the audit receipt."
- Turn Print QR codes on PDFs off.
- Click Save.
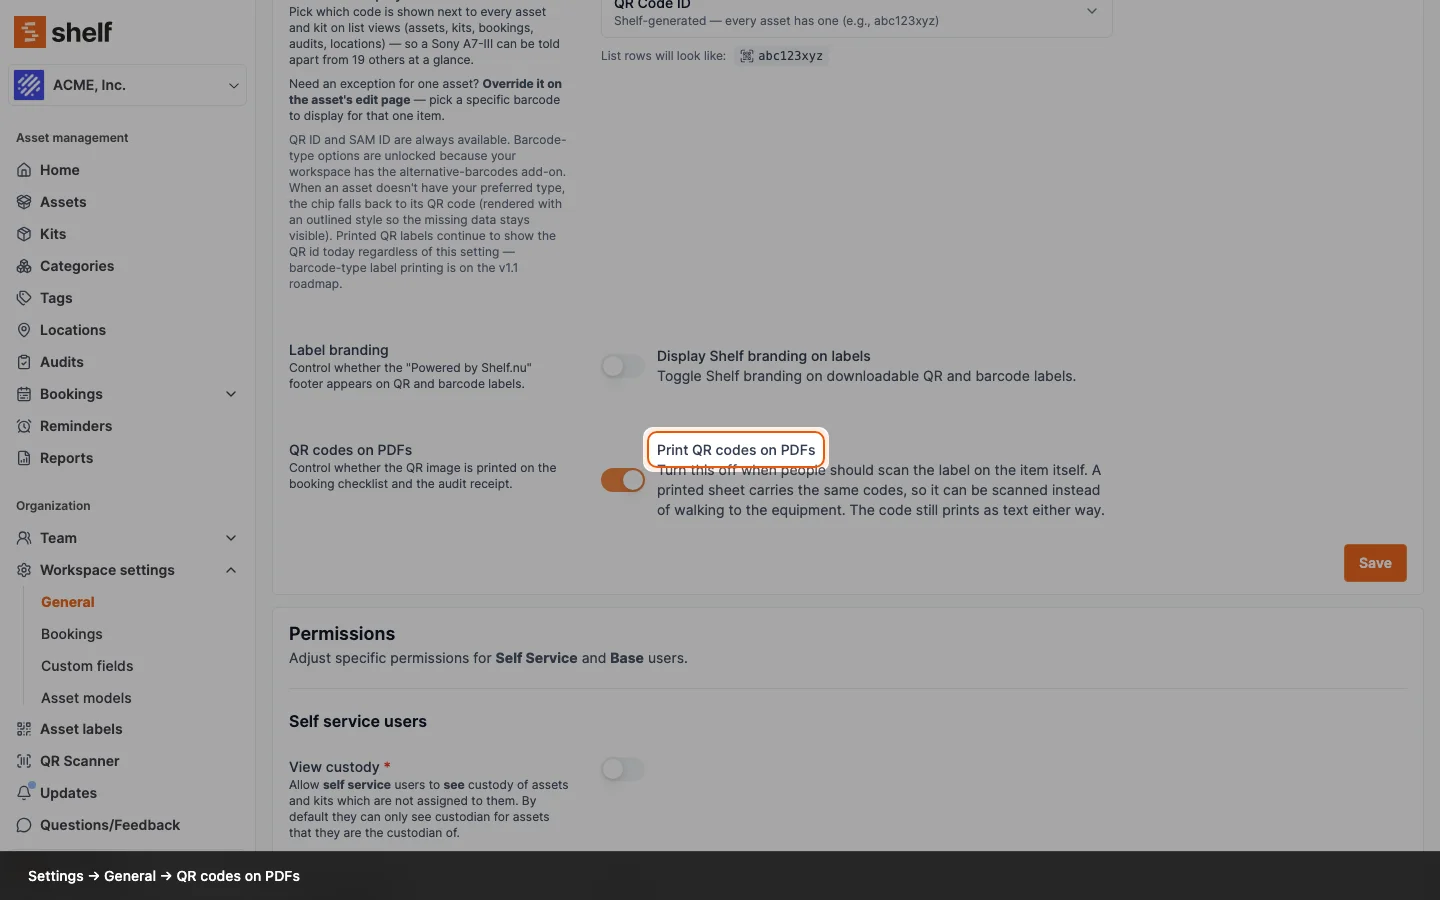
The switch is on by default, so nothing changes until you turn it off. It applies to both sheets that can print a QR image, the booking checklist and the audit receipt. The booking's check-in receipt never prints one. It is a workspace setting rather than a checkbox on the print dialog: a control the person taking the shortcut can untick before printing is not a control.
With the image off, the tick box and the code stay and the rows get shorter. The sheet is still matchable by eye, which is why the printed code and this switch arrived together.
This setting is available on every plan. It is not gated behind an add-on.
One Row per Booked Line
The table prints one row per booked line rather than one per asset. For individually tracked gear the two are the same thing: one item, one row.
It matters for quantity-tracked stock, where the same pool can reach a booking from more than one direction. Say a booking holds 10 sandbags: 4 booked loose, 3 carried in by kit Grip A, and 3 by kit Grip B. The PDF prints three sandbag rows, of 4, 3, and 3, each naming its own kit (the loose row leaves the Kit column empty). Before, those slices were collapsed into a single row showing one quantity and one kit name, which hid where the rest of the units were coming from.
Practical Applications
Users have found numerous valuable applications for this feature:
- Pre-packing Checklist: Use the PDF as a checklist when packing items for transport, ensuring nothing is left behind.
- Physical Sign-off: Collect physical signatures from custodians taking responsibility for assets, providing accountability. For the return, print the check-in receipt instead: it records what came back, when, and who received it, and it has its own signature lines.
- Offline Backup: Keep a physical record of assets checked out, useful where digital access might be limited.
- Inventory Audits: Quickly cross-reference physical assets against the booking list during audits or spot checks.
Best Practices
- Generate the PDF shortly before the booking start date to ensure up-to-date information.
- Consider keeping both digital and physical copies for redundancy.
- Check items in by scanning the label on the item, not the square on the sheet. Both encode the same asset, so scanning the paper records a check-in for gear nobody has looked at. If your team is likely to take that shortcut, turn Print QR codes on PDFs off in Settings → General and work from the printed code instead.
Ready to try Shelf?
Put what you're learning into practice. Free plan available — no credit card required.