Changing User Roles in Shelf
This guide explains how to change a user's role within your Shelf workspace while maintaining data integrity.
Changing User Roles in Shelf
This guide explains how to change a user's role within your Shelf workspace while maintaining data integrity.
Understanding the Process
Changing a user's role in Shelf requires revoking their current access and re-inviting them with the new role. This process preserves all asset assignments and historical data while allowing you to modify their permissions.
Step-by-Step Guide
Step 1: Revoke Current Access
- Navigate to Settings > Team
- Find the user whose role you want to change
- Click on "Actions" next to their name
- Select "Revoke access"
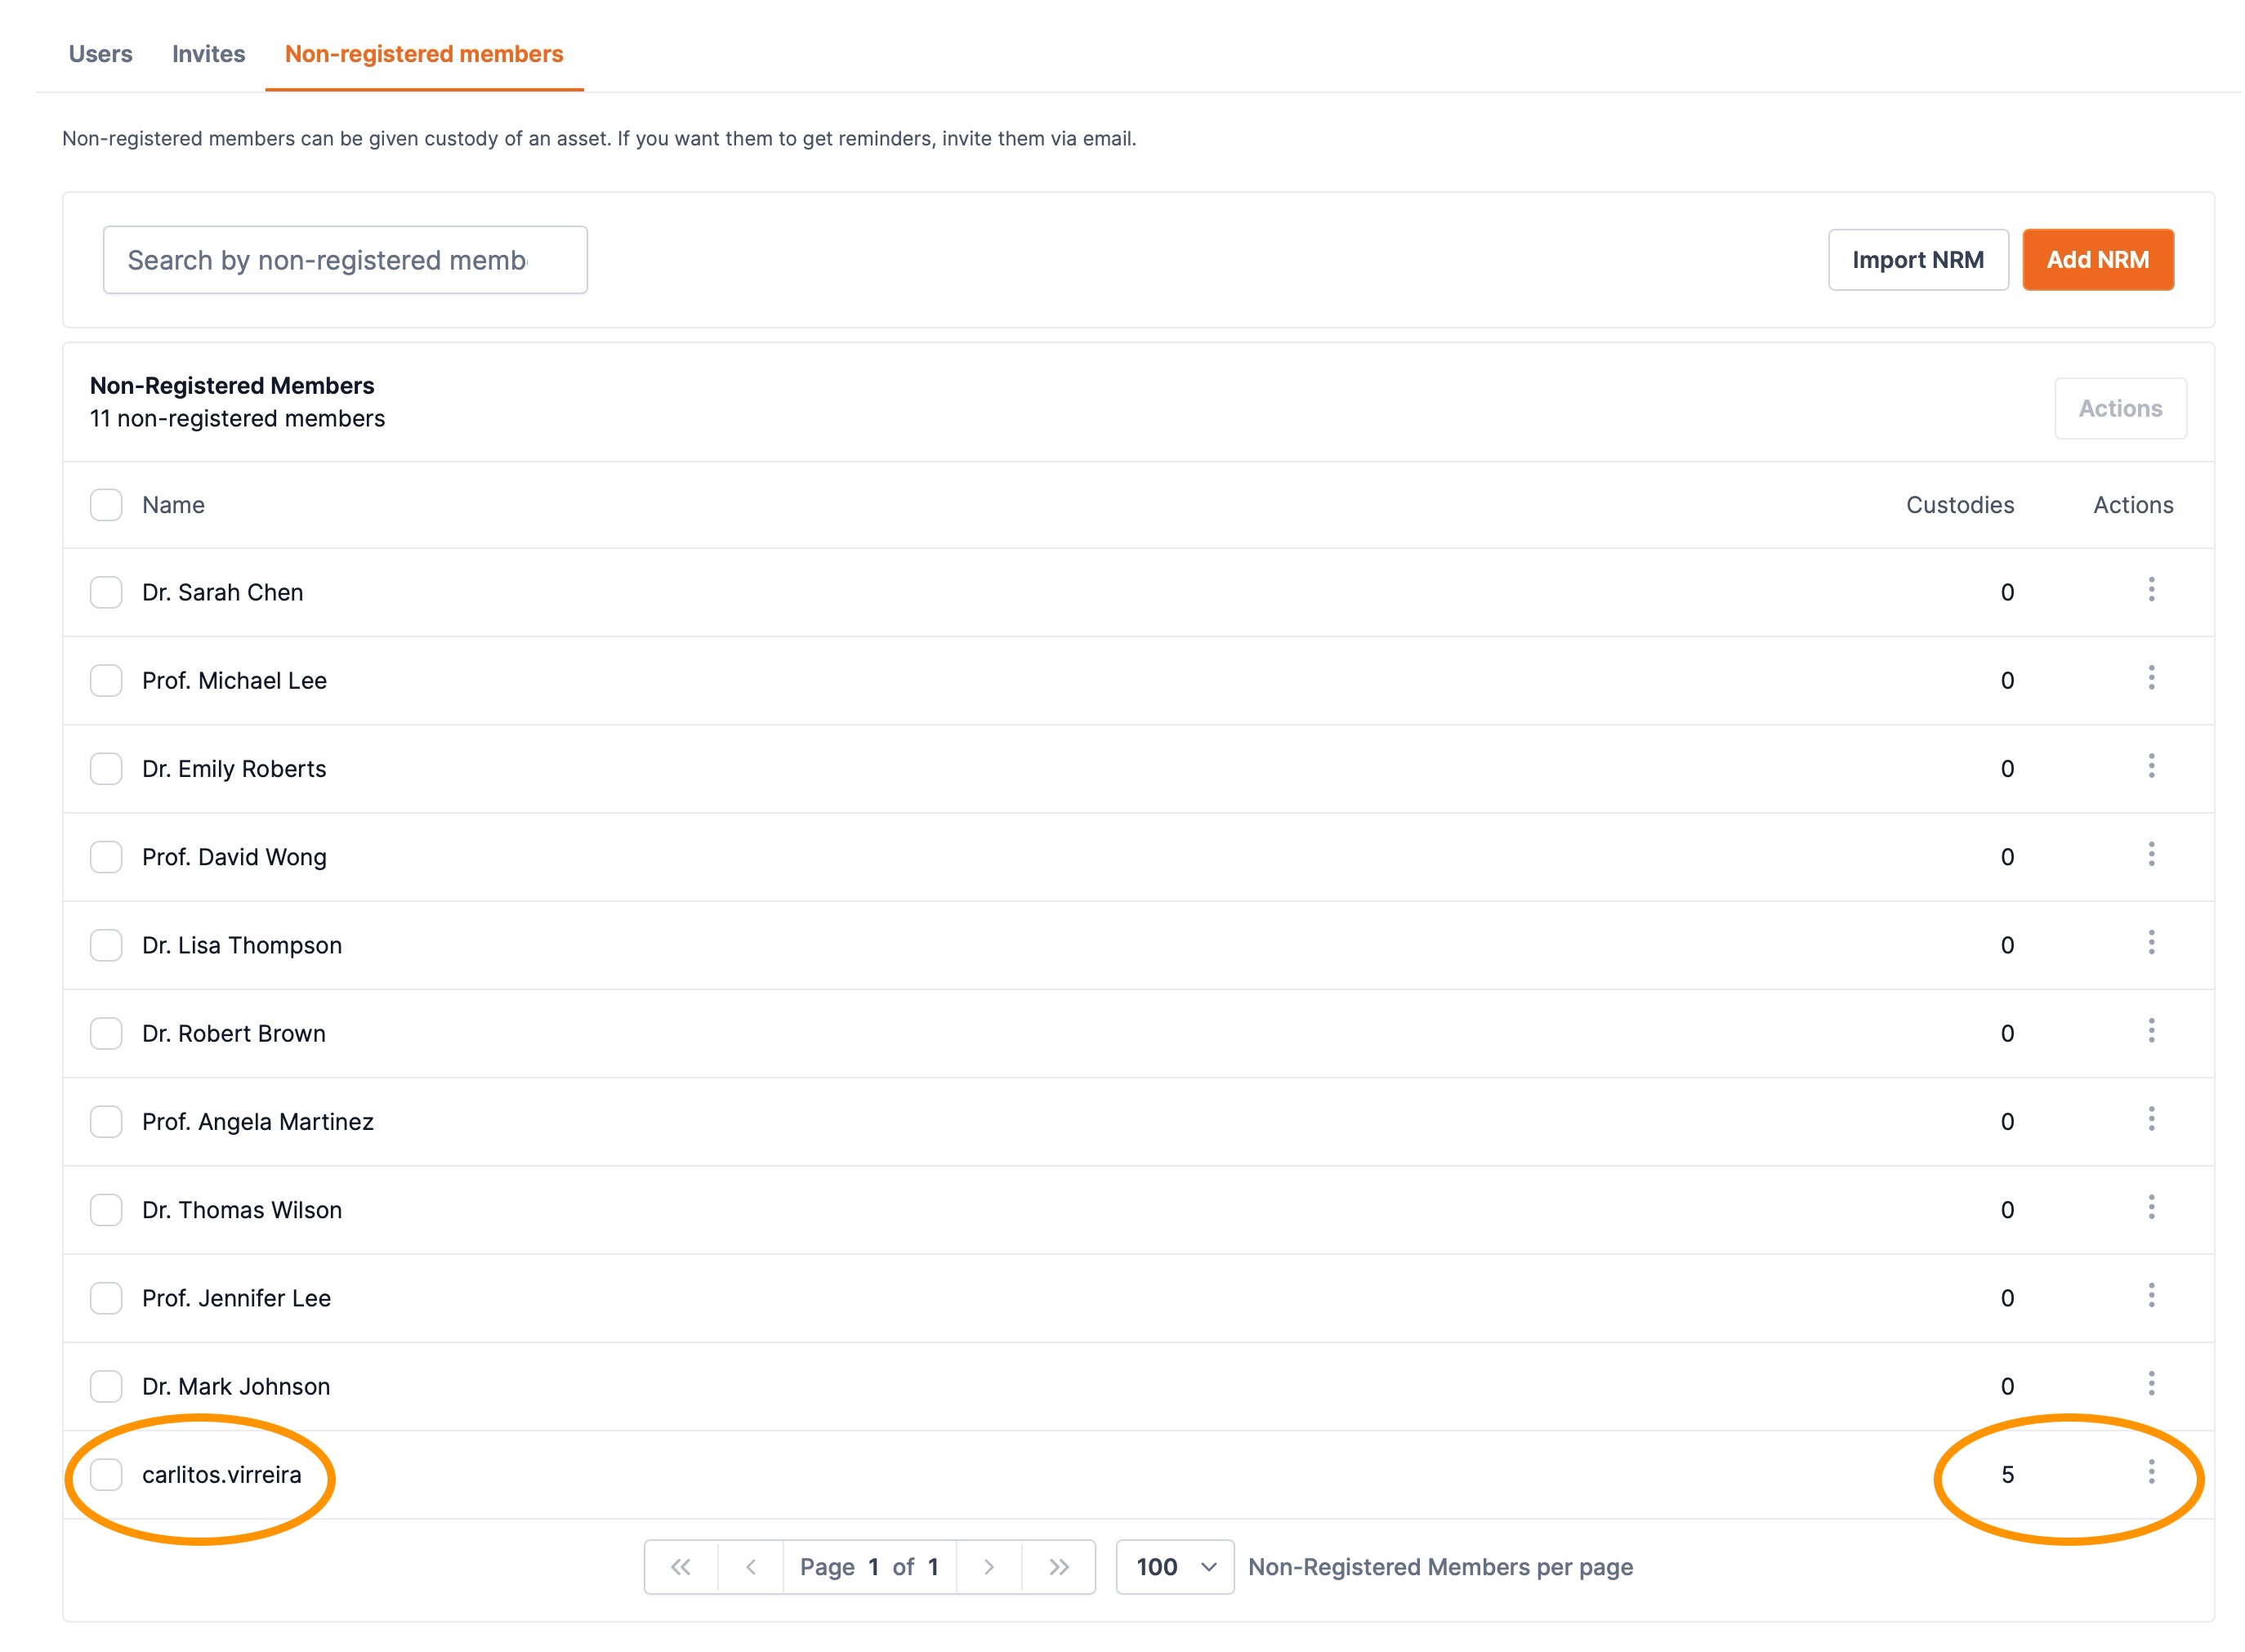
Note: When you revoke access, the user becomes a Non-Registered Member (NRM). This ensures that all assets and data associated with this user remain intact in your database.

Step 2: Re-invite the User
- Locate the user in the Non-Registered Members section
- Click "Actions" next to their name
- Select "Invite"
- Choose the new role you want to assign
- Confirm the invitation

Step 3: Monitor Invitation Status
You can track pending invitations in the "Pending Invitations" tab under Settings > Team.


Important Considerations
- During the transition period, the user will exist as a Non-Registered Member (NRM)
- All asset assignments and historical data are preserved throughout this process
- Once the user accepts the new invitation, they will automatically regain access to their associated assets
- The user will need to accept the new invitation to complete the role change
For any questions about changing user roles, reach out to our support team at support@shelf.nu.


