Getting Started with Shelf
A step-by-step guide for new users setting up their first workspace, from license activation through team management.

Step 1: You Got Your License -- What's Next?
Upon purchasing a Team License, your license applies to a workspace you own.
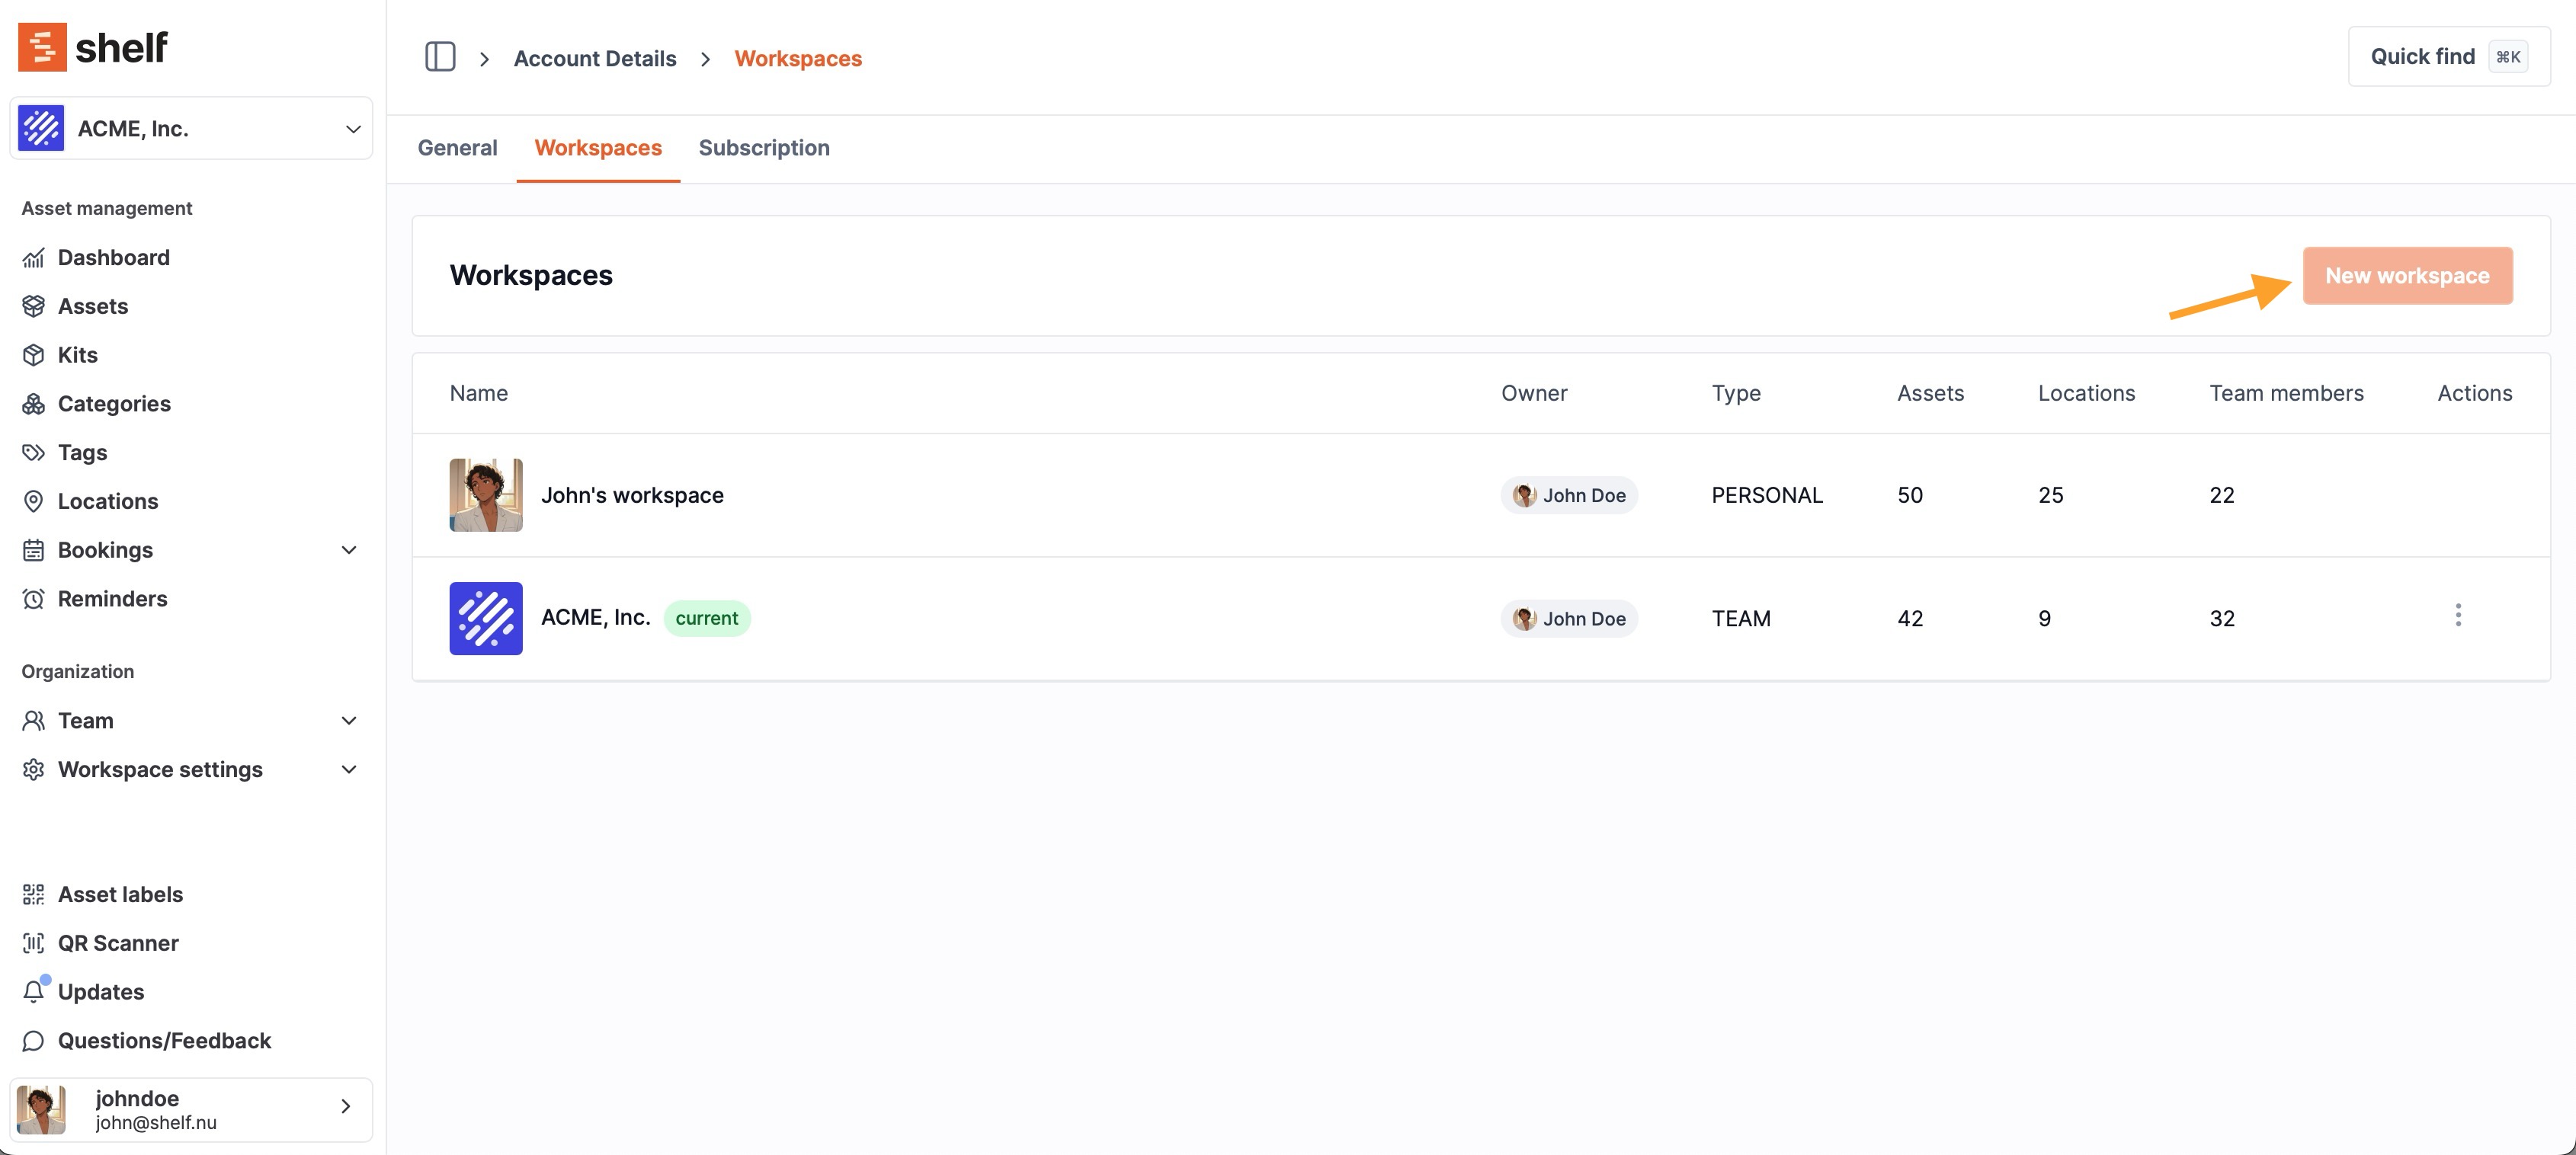

- If you had a trial workspace, it's now upgraded.
- If you purchased via invoice without an existing workspace, you'll need to create it manually.
Create your team workspace at the account details section.
Note: Each user can have only one personal workspace, but there's no limit to how many team workspaces you can create or join.
Step 2: Add Your Assets
You can populate your workspace in three ways:
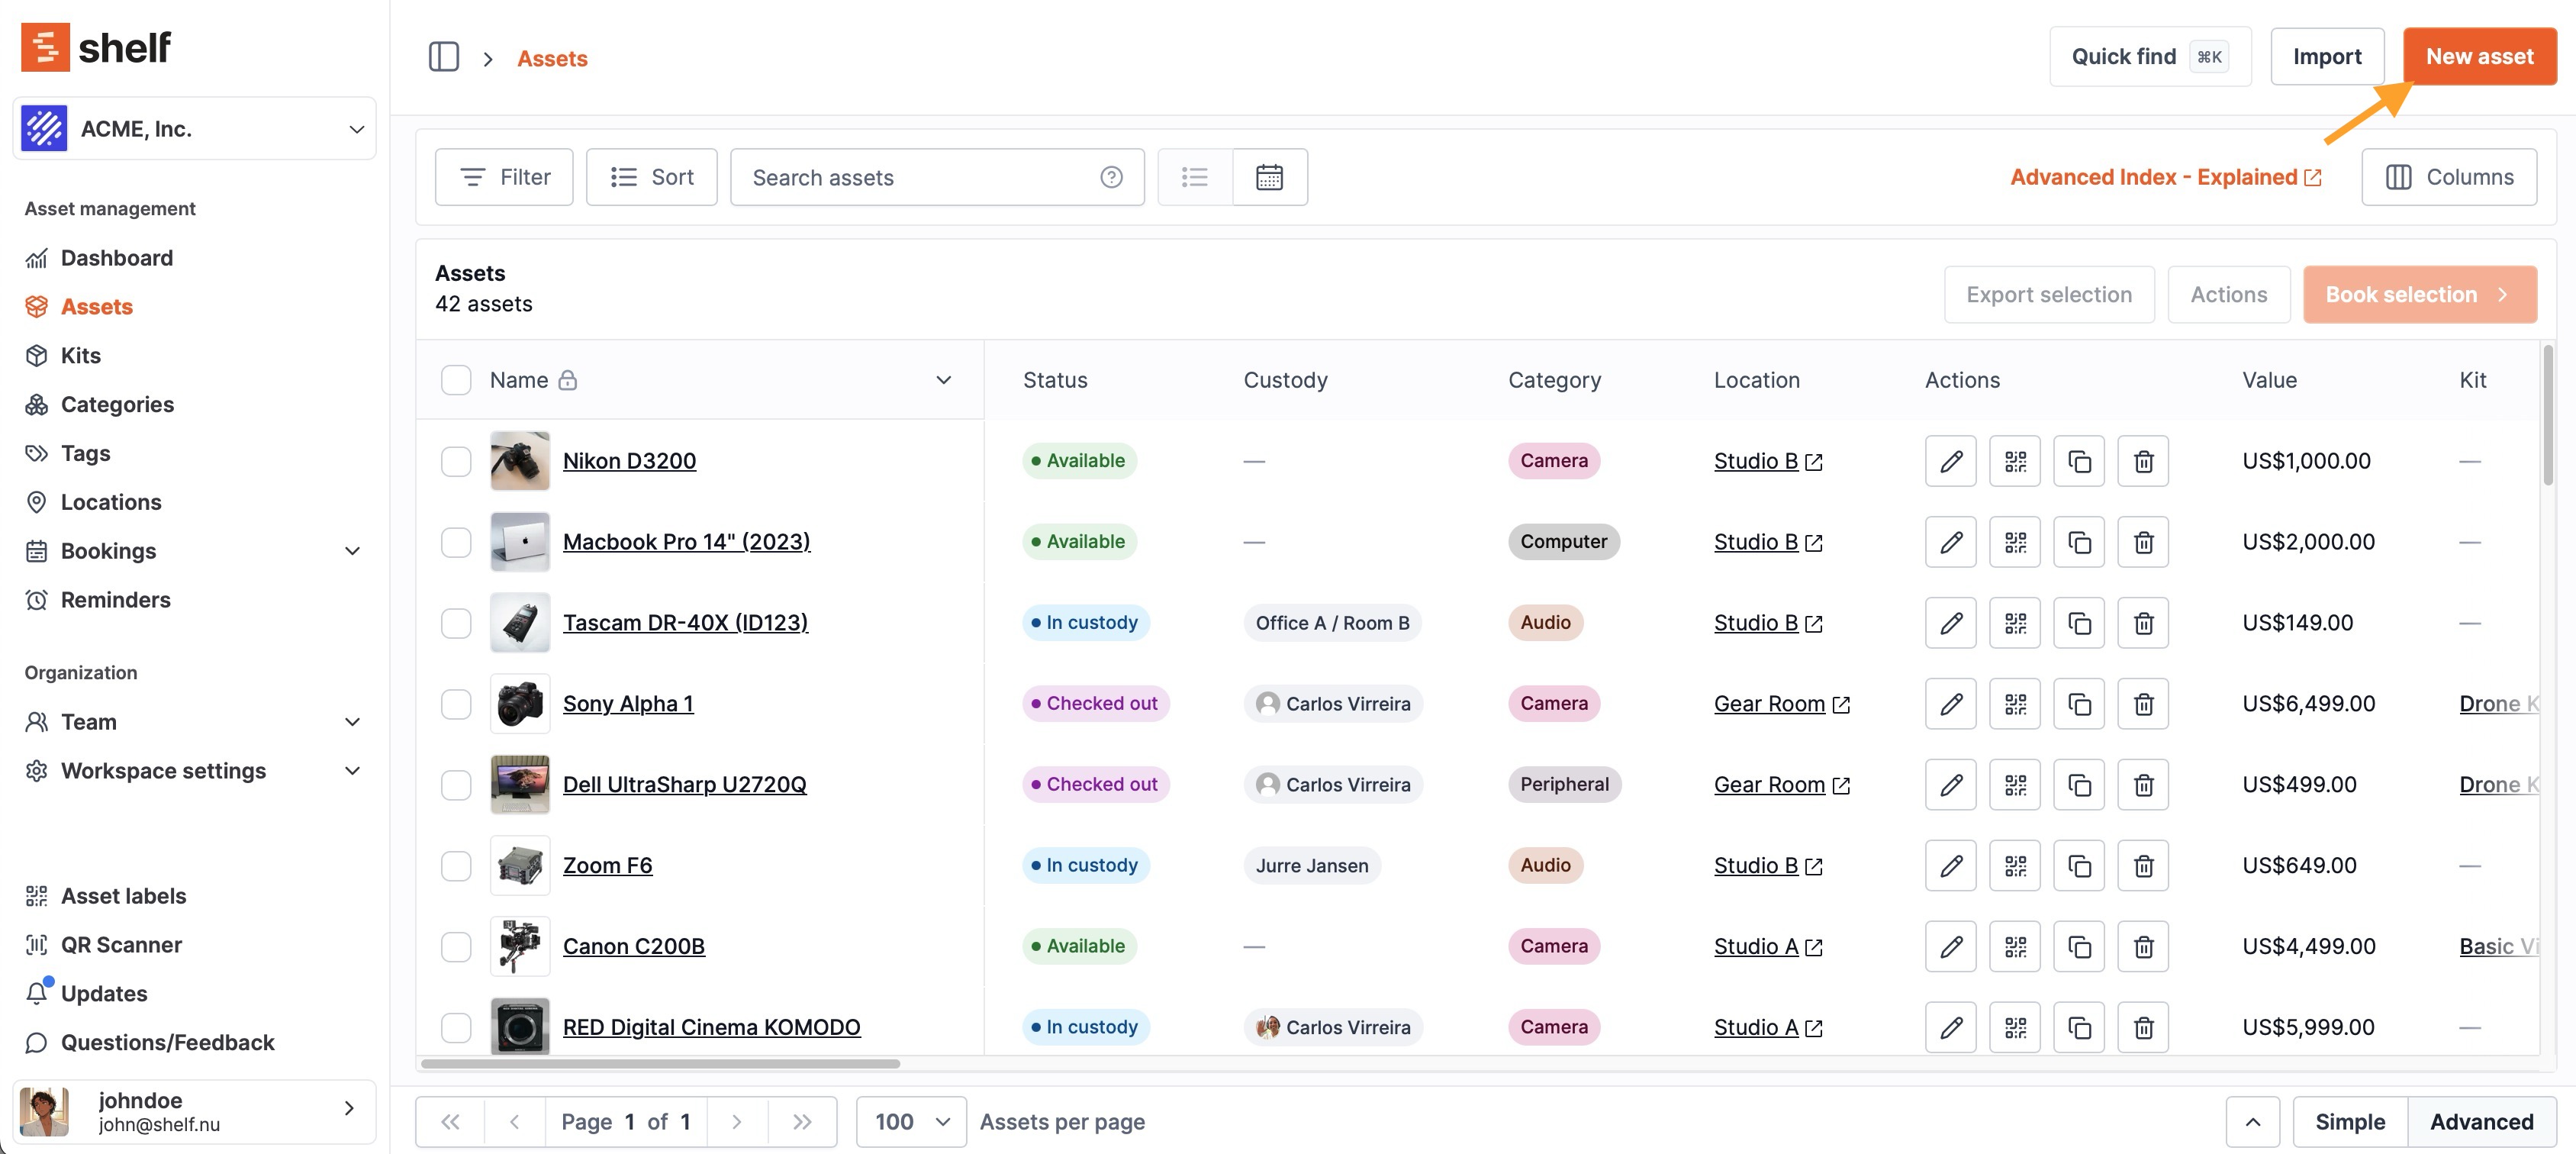
Option 1 -- Add Manually
Create assets individually using the "Add asset" button inside your workspace.
Option 2 -- Import via CSV
Use the CSV Import Helper to prepare your import file. Shelf automatically matches headers to your database fields.
Tip: For items with existing QR or barcodes, ensure your header reflects the correct format (e.g.,
barcode_Code128for Code 128 barcodes).
Minimal CSV Structure Example:
| name | category | location | barcode_Code128 |
|---|---|---|---|
| Canon 70D | Camera | Main Studio | 123456789012 |
| Tripod | Grip | Storage Room | 654321987654 |
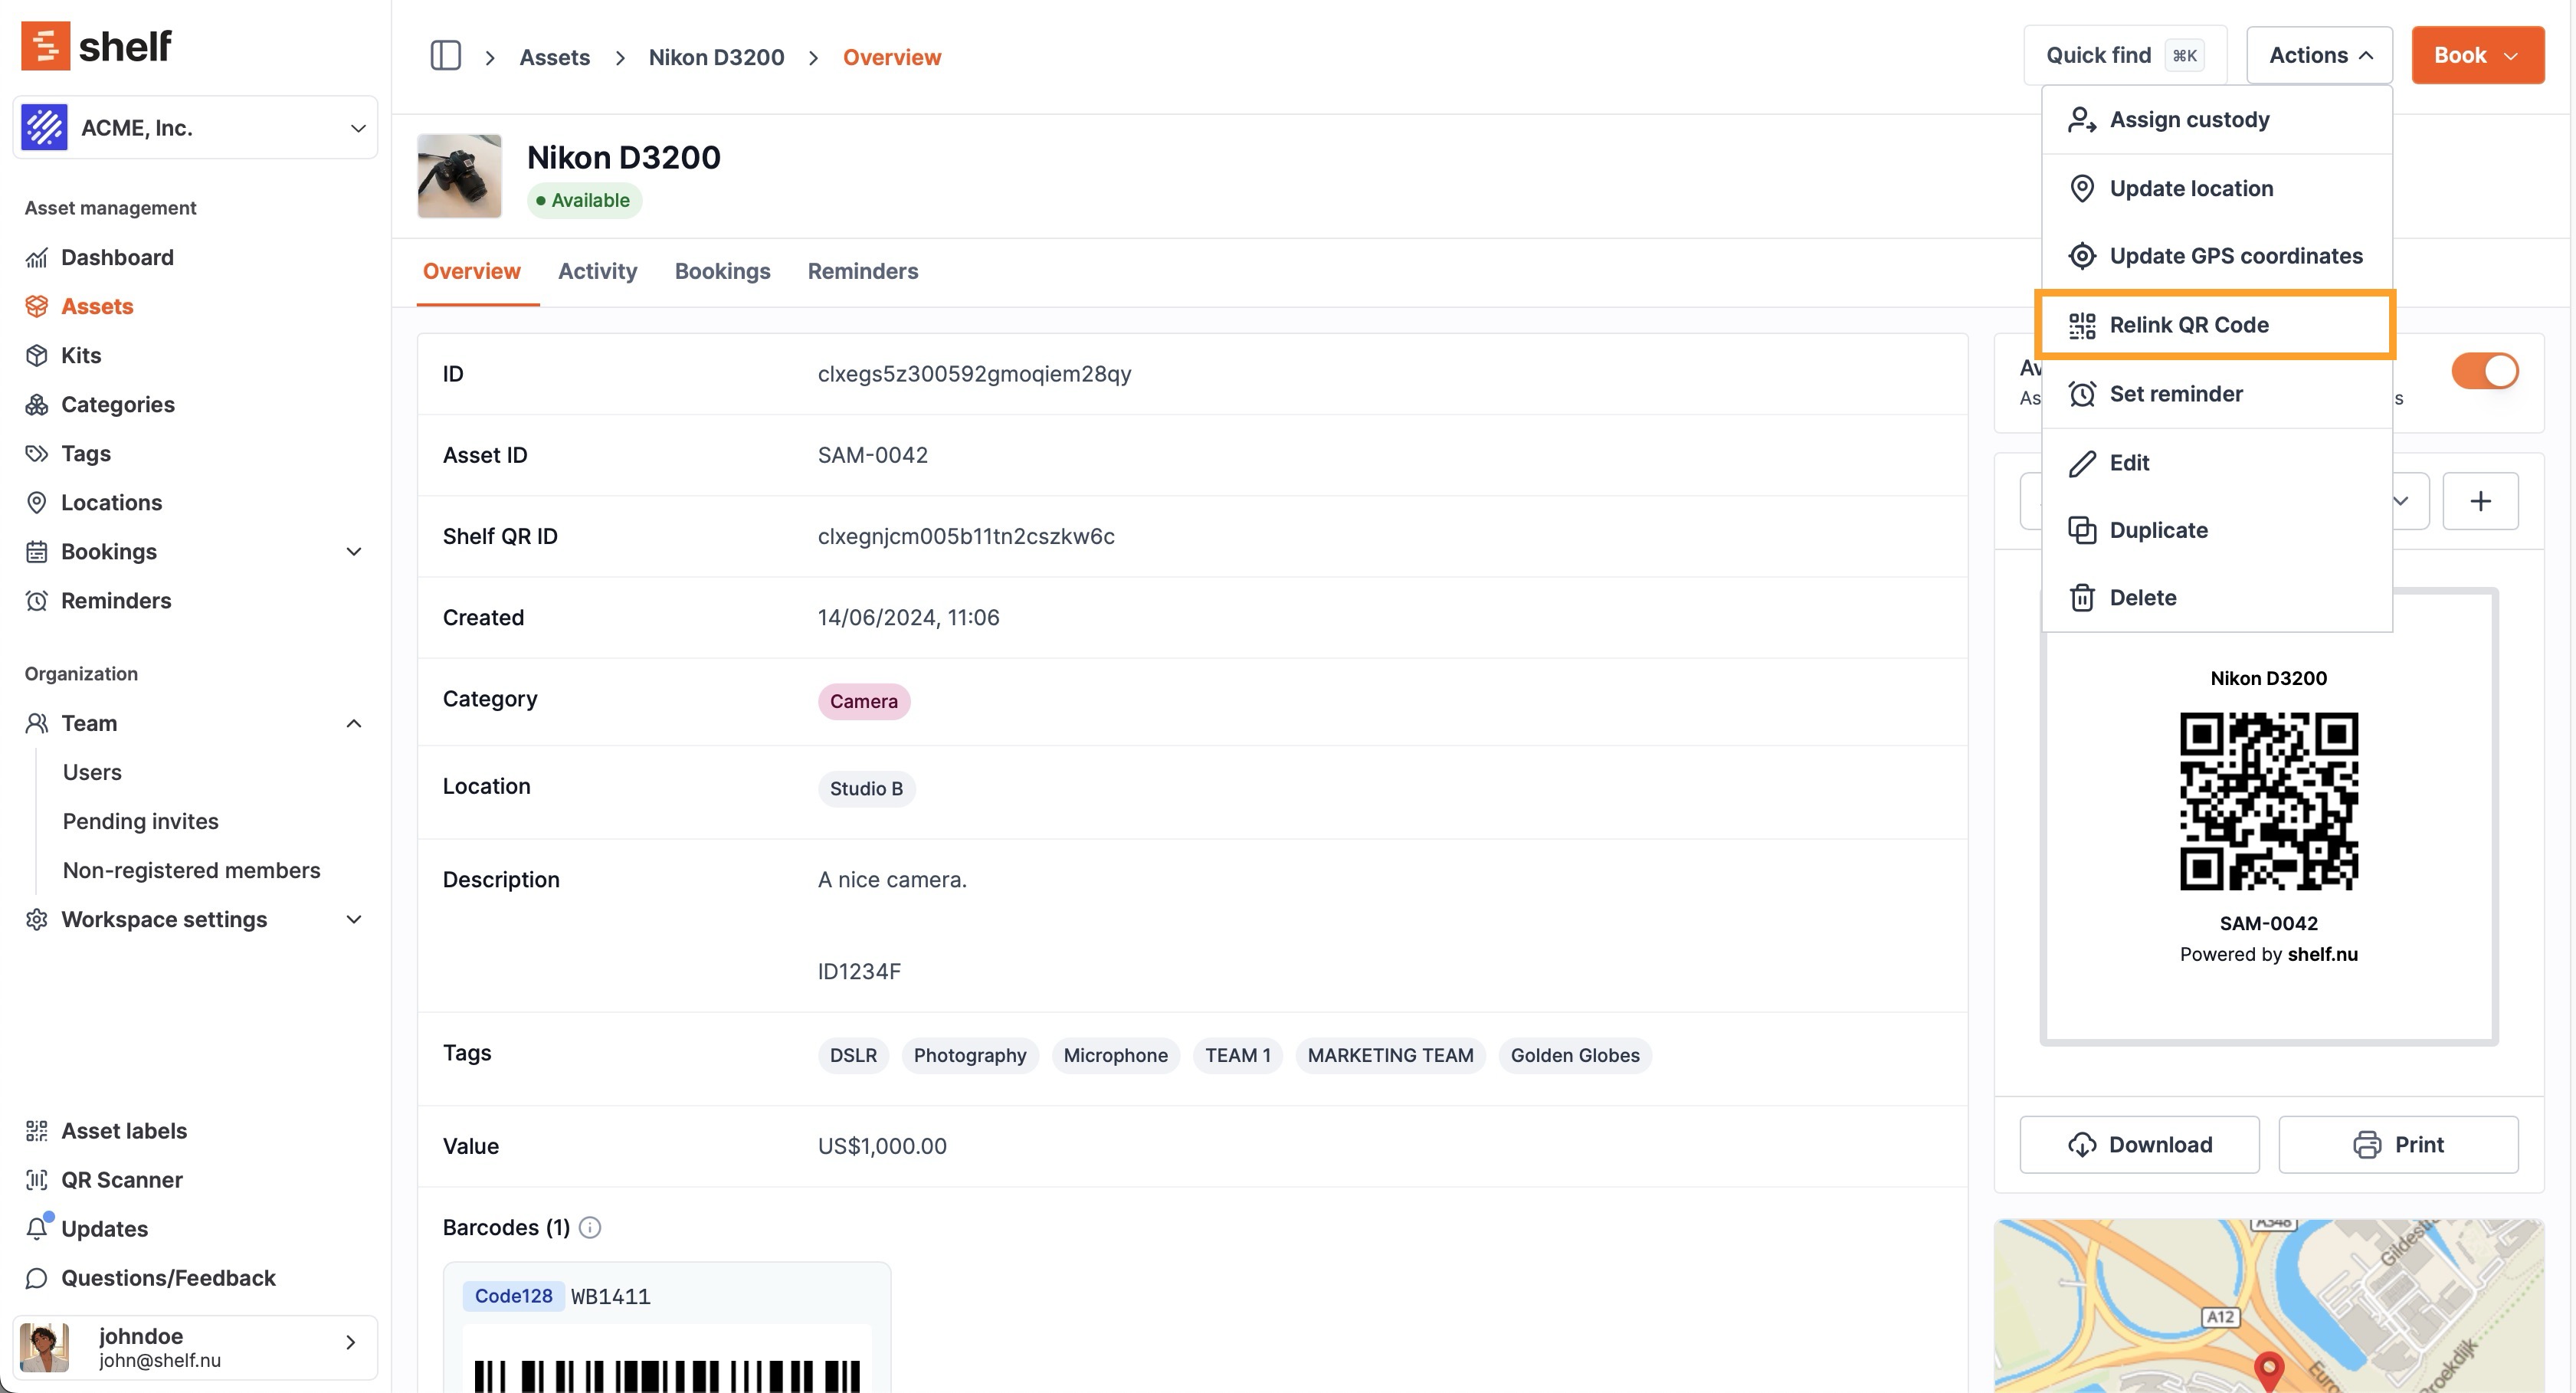
Option 3 -- Add or Link QR Codes
Two approaches available:
- Shelf Codes (Generated in-app): Add or print labels from within Shelf.
- External Codes (Add-On Enabled): Include existing codes directly in CSV or link manually.
For manual linking, see: How to use alternative barcodes in Shelf.
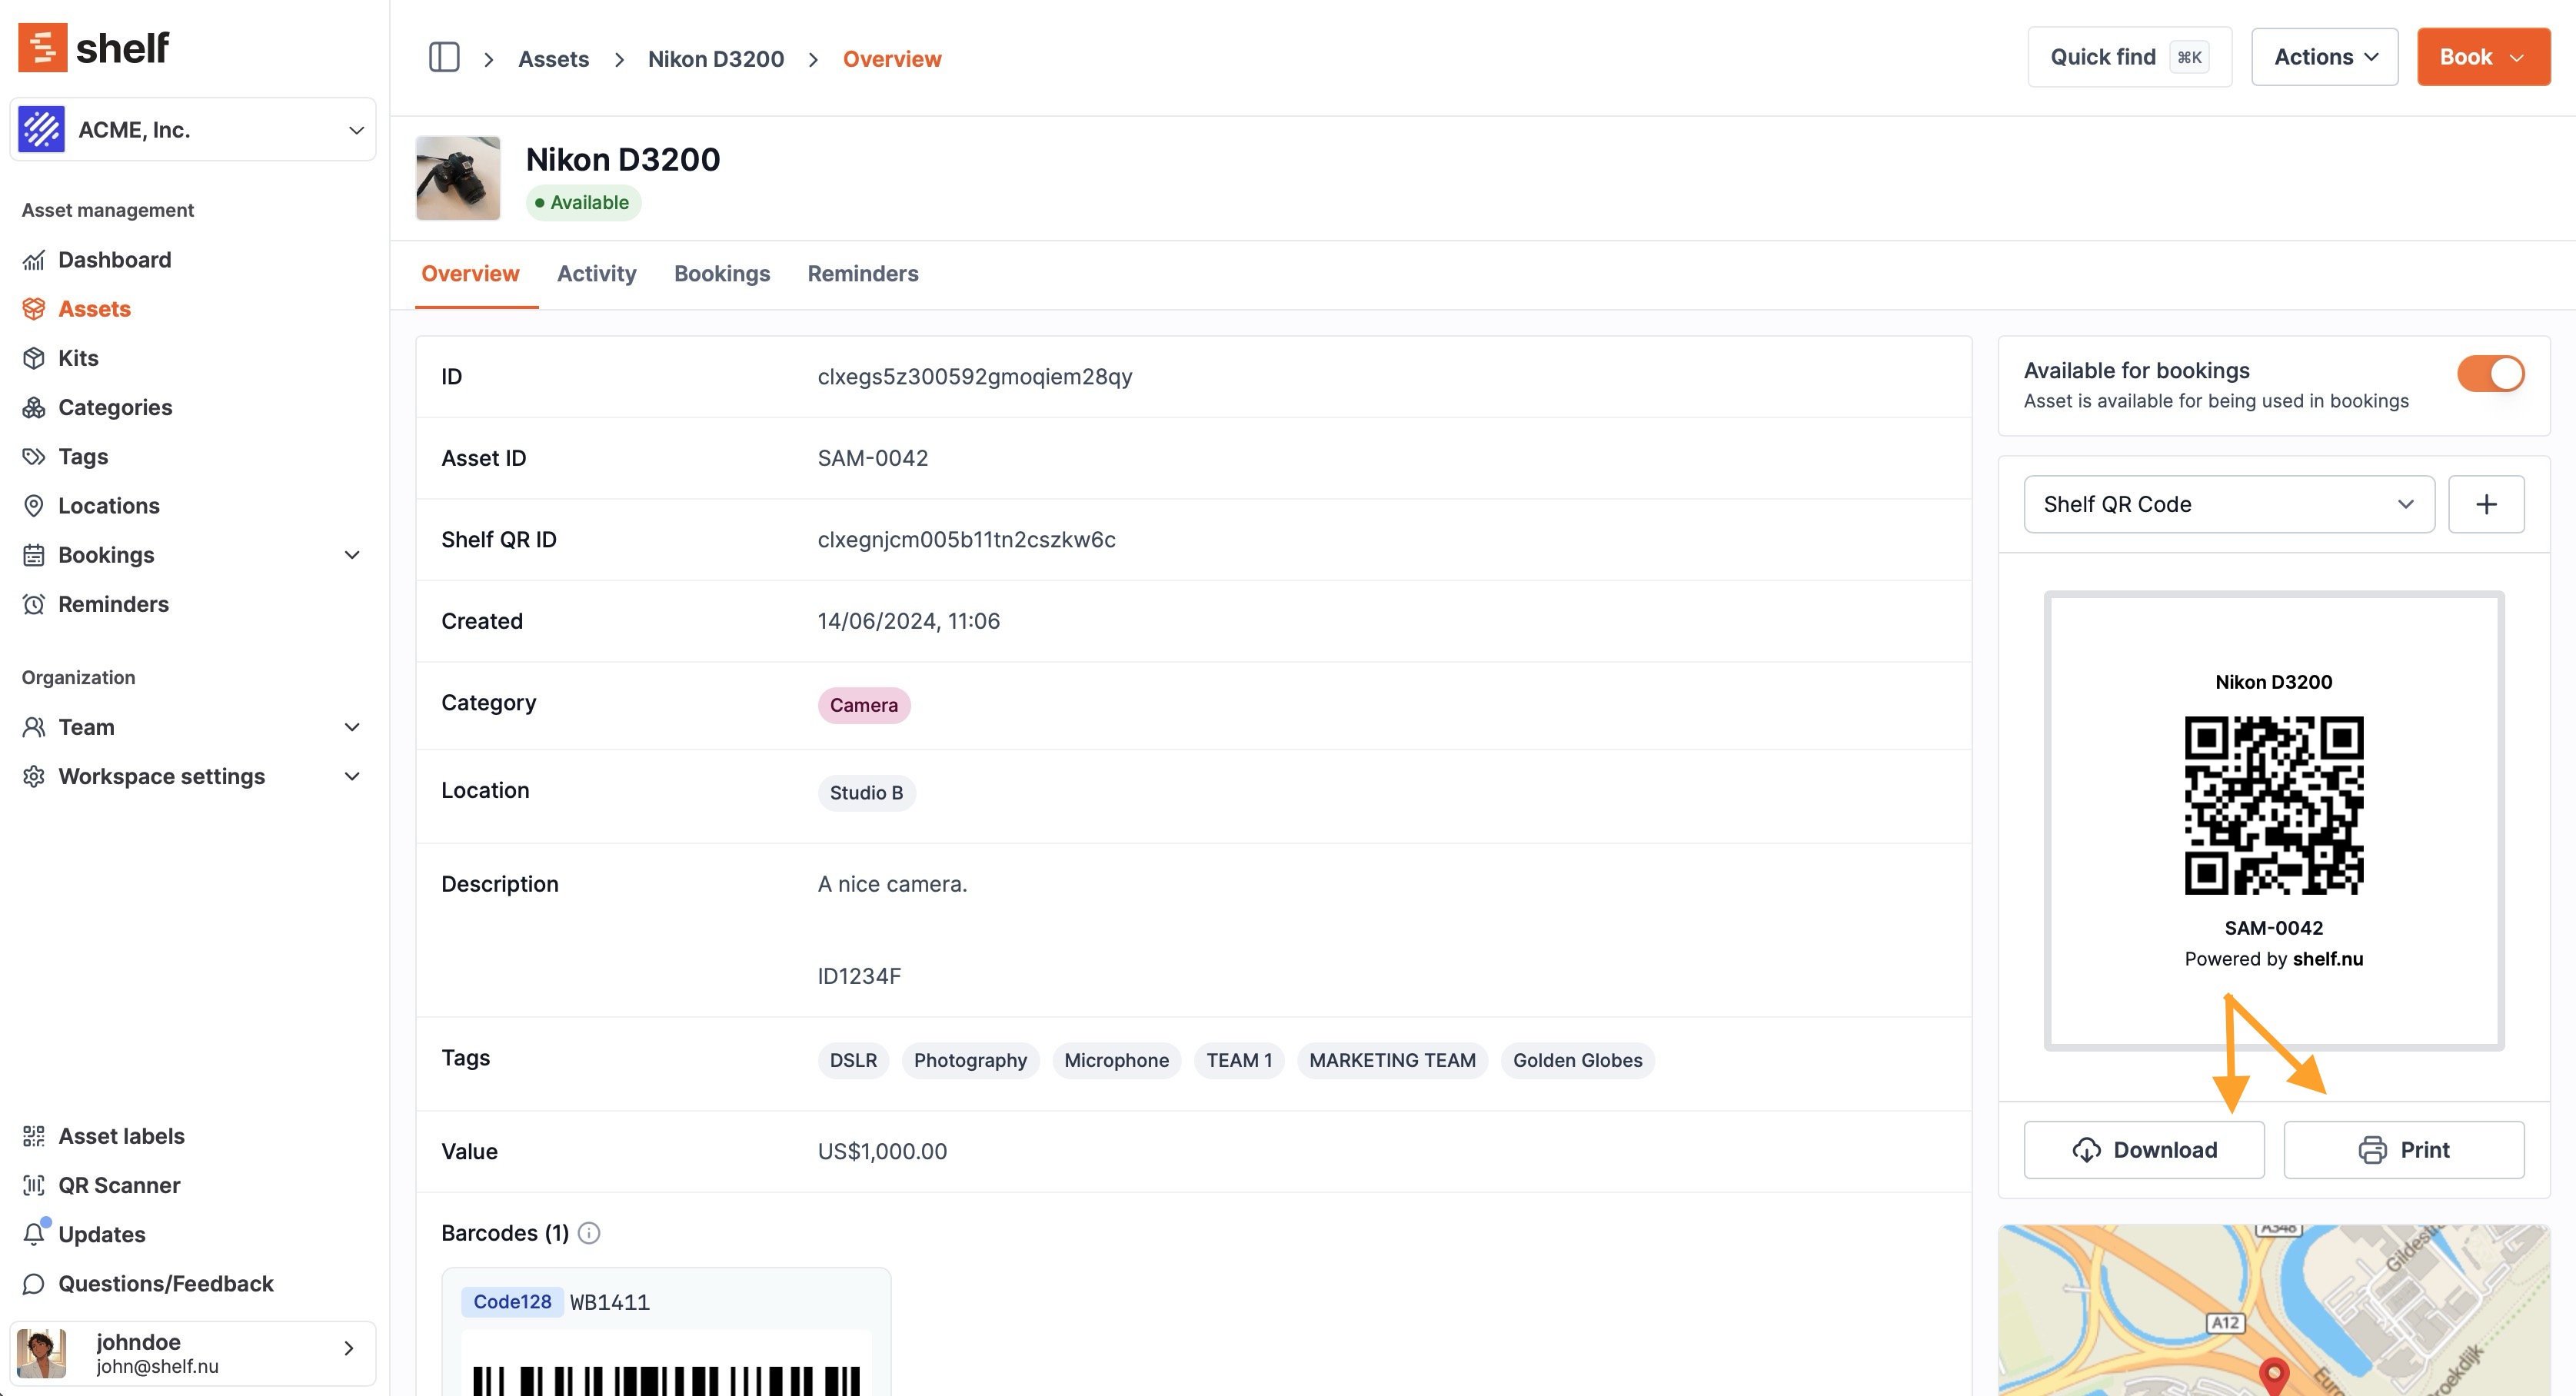
Step 3: Printing Labels and QR Codes
1. From an Asset Page
Open any asset and click "Download" on the asset label to generate a .png file.
Note: Shelf labels are square (1:1 aspect ratio) -- use square label paper for efficiency.
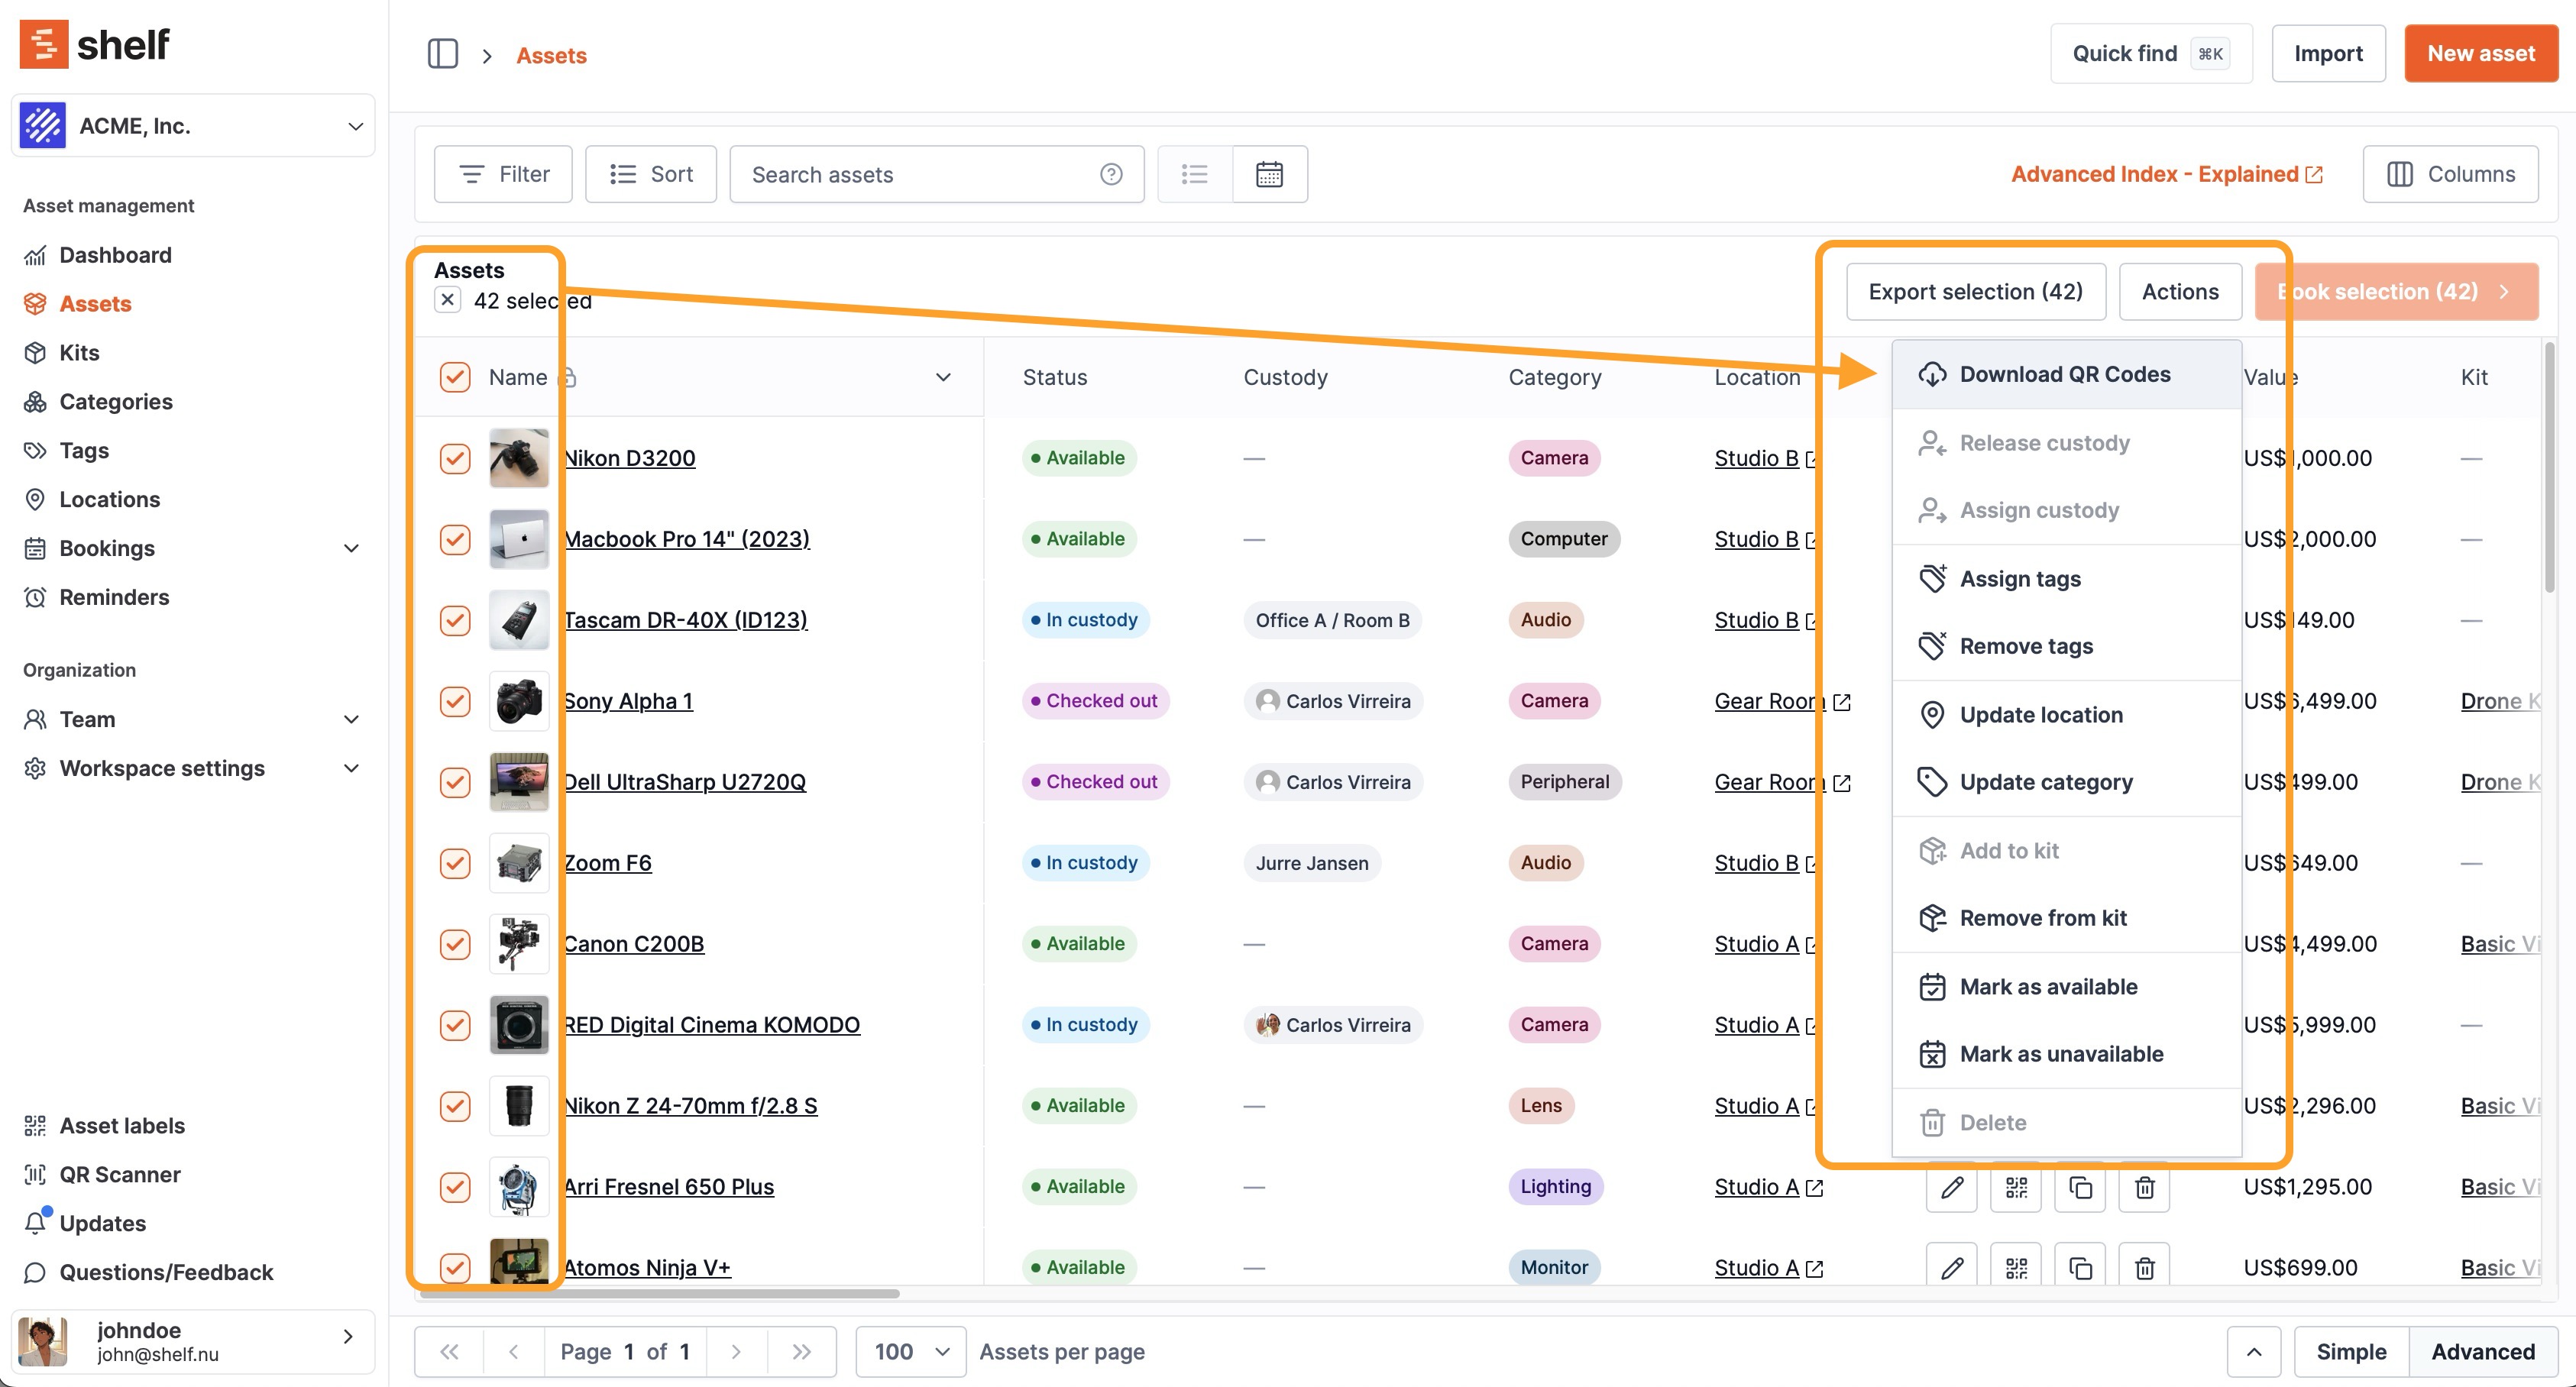
2. From the Asset Index (Bulk Download)
Go to your Assets list, select multiple assets, click "Actions", then "Download QR codes" to receive a .zip file.
Warning: If QR codes appear empty, simply click "Download QR codes" again.
Step 4: Invite Your Team
Once your workspace is ready, invite team members through the user management section:

- Invite users via email
- Assign appropriate roles: Admin, Manager, Staff, Viewer
- Review permissions in the user roles documentation
Important: Verify you're in the correct workspace (check top-left corner) before inviting users.
Step 5: Start Managing Your Assets
Once setup is complete, you can:
- Assign custody or ownership of assets
- Create and approve bookings
- Scan QR codes to check in/out equipment
- Track maintenance and usage through activity logs
Tip: Use Categories, Locations, and Kits to organize your database efficiently.
Quick Recap
| Step | Action |
|---|---|
| 1 | Create your team workspace |
| 2 | Add your assets (manual or CSV) |
| 3 | Link or import QR codes |
| 4 | Invite your team |
| 5 | Start managing your database |
Need Help?
For questions or issues, contact: [email protected]
Visit the Knowledge Base for additional resources.
Ready to try Shelf?
Put what you're learning into practice. Free plan available — no credit card required.