Sublocations: Organize Locations into Hierarchies
Learn how to use sublocations to organize your equipment across multiple sites, buildings, and rooms by establishing parent-child location relationships.
Use sublocations when your equipment is spread across multiple sites, buildings, rooms or cages, when different teams share the same building, or when you need cleaner reporting by building/floor/room. If you only have a handful of locations, a flat list is still fine.
What Sublocations Are
Sublocations in Shelf are not a separate object type. There is only one kind of location. A "sublocation" is simply a location that has another location set as its Parent location.
 By filling in the Parent location field, you can build hierarchies instead of a flat list, for example:
Campus > Building > Floor > Room > Rack
Every node is just a normal location that can hold assets and kits.
What Sublocations Are Good For
Use sublocations when:
- You manage equipment across multiple sites or buildings
- You need to know not just which warehouse, but which room or cage
- Different teams share the same building but use different areas
- You want cleaner reporting by building, floor, room, etc.
If you only have a few locations, a flat list is fine. Shelf supports hierarchies up to 12 levels deep per organization.
How to Create a New Location as a Sublocation
- Go to Locations in the left sidebar.
- Click Create location.
- Enter a Name (for example:
Storage room,Control Room,Camera Cage). - In the Parent location field:
- Leave it as No parent if this is a top-level location, or
- Select the location it belongs under (for example:
Meander 901orStudio A).
- (Optional) Add a Main image, Address, and Description.
- Click Save.
A sublocation is created when a link is established to a parent element. You'll see it in the Locations index (with Parent location and Child locations columns), on its parent's page in the Child locations list/tree, and anywhere you can assign assets and kits to locations.
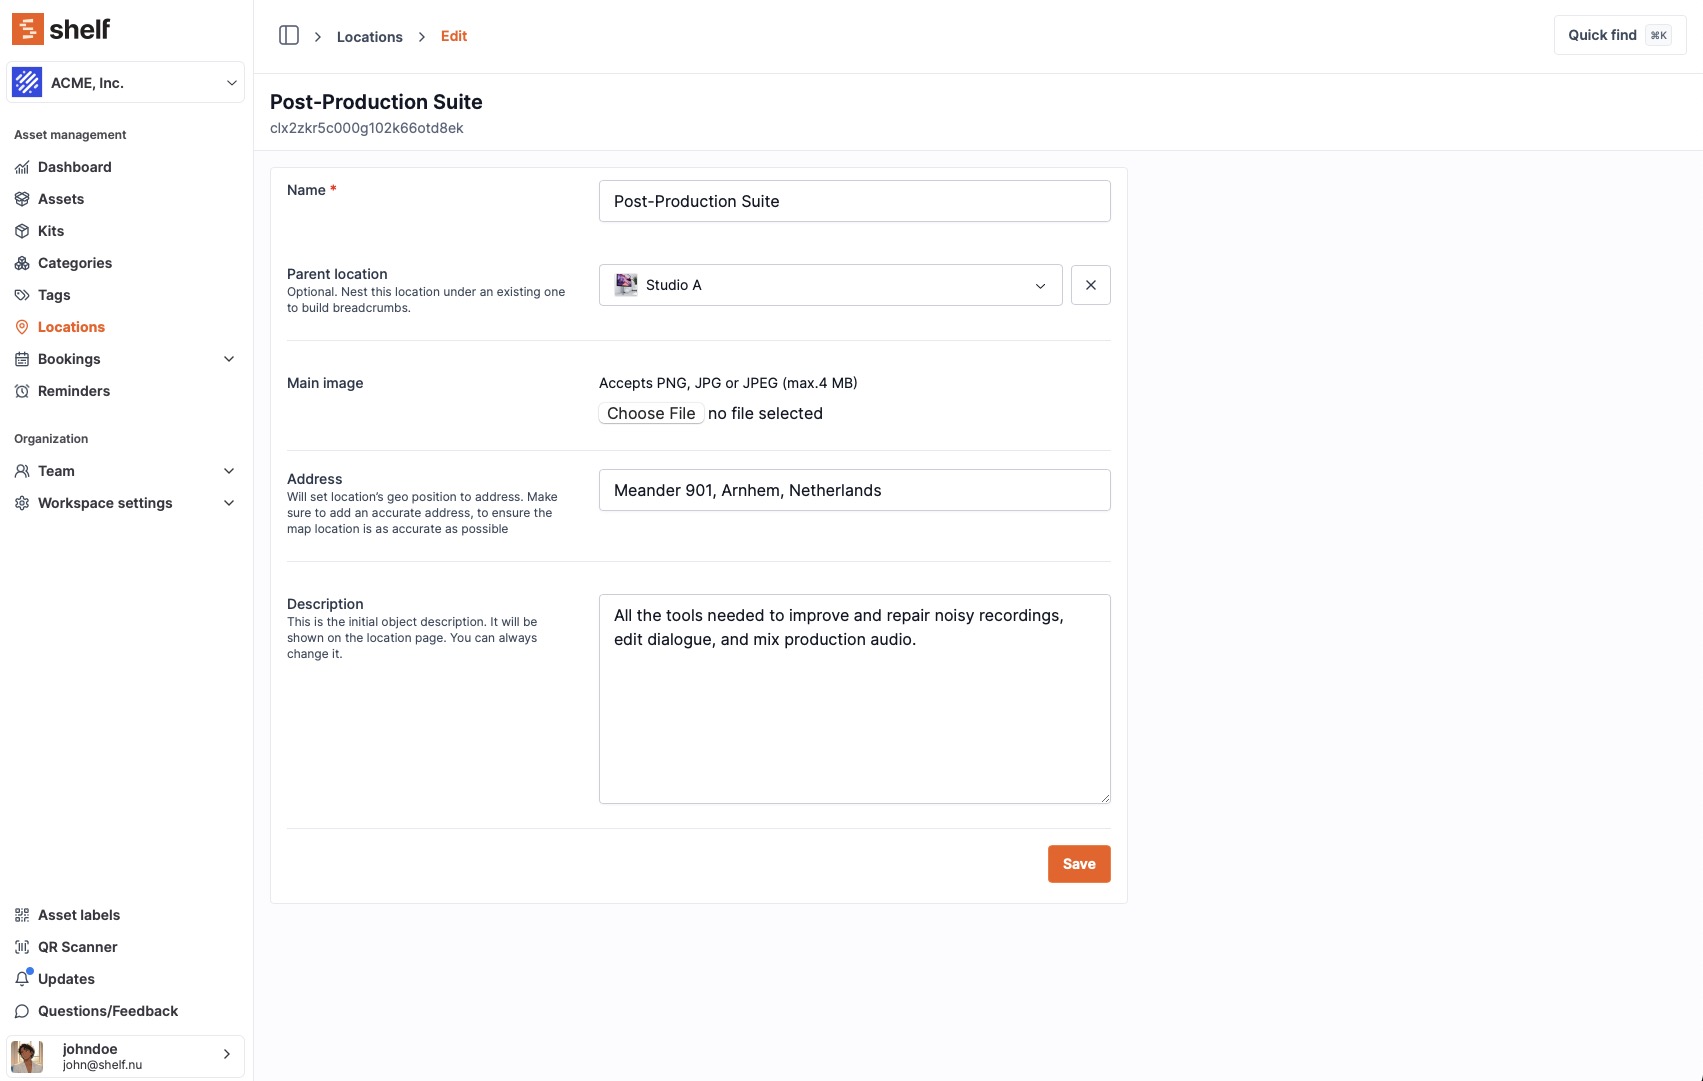
Turning an Existing Location into a Sublocation
You can convert existing flat locations into a hierarchy by setting their Parent location.
- Go to Locations and click the location you want to re-organize (for example:
Post-Production Suite). - On the edit page, find the Parent location field.
- Change it from No parent to the correct parent (for example:
Studio AorMeander 901). - Click Save.
All assets and kits assigned to that location stay attached. Only its position in the hierarchy changes.
Note: You can only pick a parent inside the same organization/workspace. Sublocations cannot cross organization boundaries.
Navigating Your Location Hierarchy
Shelf gives you two main ways to see where you are in the tree.
Breadcrumbs
At the top of the location page you'll see a breadcrumb, for example:
Meander 901 / Studio A / Post-Production Suite
You can click any part of the breadcrumb to jump up the hierarchy.
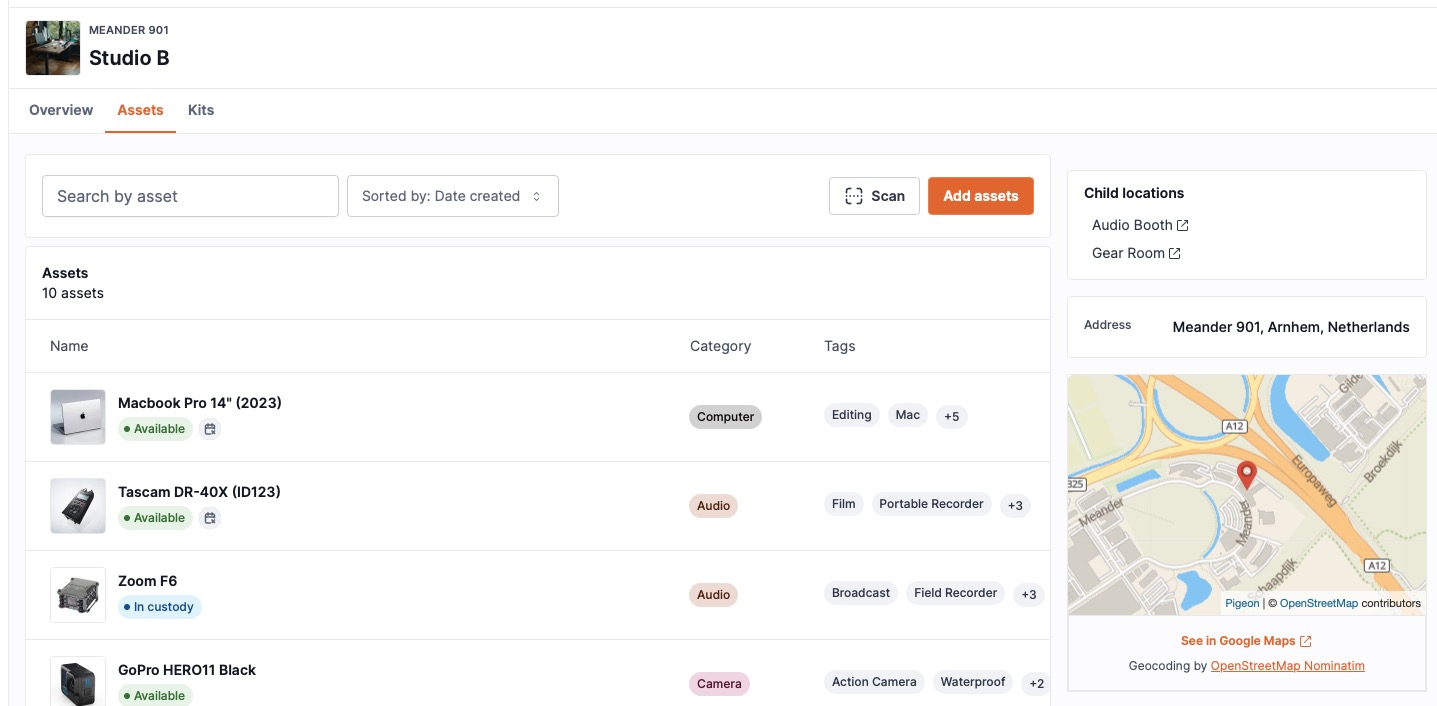
Child Locations
On the parent location's page you'll see a Child locations list/tree. From there you can:
- See how many locations live under a parent
- Click into any child location quickly
- Build out deeper levels (e.g.
Building > Floor > Room)
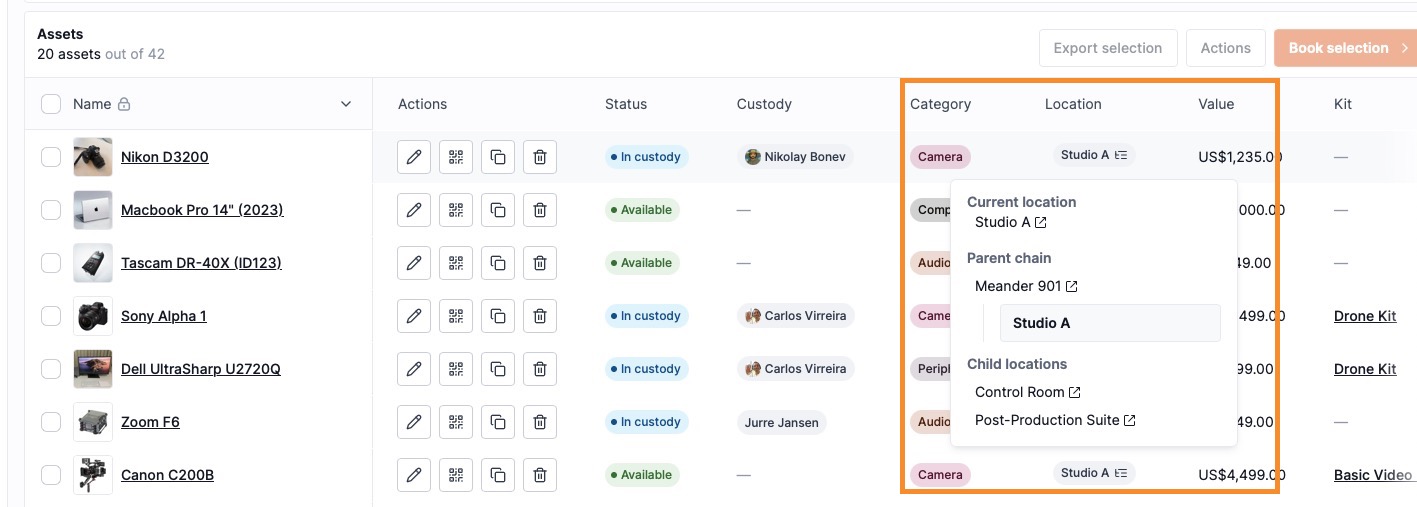
In the Locations index you'll also see:
- A Parent location column (who this location lives under)
- A Child locations column (how many locations sit below this one)
Limits and Safeguards
To keep hierarchies healthy:
- Max depth: A hierarchy can go up to 12 levels deep. If you try to nest deeper, Shelf will block the change and show an error.
- No loops: A location cannot be its own parent and cannot be placed under one of its own descendants.
- Same organization only: A parent must belong to the same organization.
- Same behaviour everywhere: Assets and kits behave the same on every node (parent or child).
Example Hierarchies
University Campus
Campus > Faculty building > Floor > Lab > Storage cabinet
Production Company
Meander 901 > Studio A > Post-Production Suite > Gear Room
Utilities / Field Services
Region > Substation > Building > Room > Rack
Frequently Asked Questions
Do I have to use sublocations? No. Existing flat locations continue to work. You can adopt sublocations gradually, starting with one site or building.
What happens to assets if I change a location's parent? Assets and kits stay attached to that location. You're only changing where the location appears in the hierarchy.
Can I see one big tree across all workspaces? No. Location hierarchies are scoped to a single organization/workspace.
Can I change the hierarchy later? Yes. You can add, rename, and re-parent locations as your spaces change, as long as you respect the depth and loop rules above.
Next Steps
- Open Locations in your Shelf workspace.
- Identify your top-level locations (e.g. sites or buildings) -- keep Parent location = No parent.
- For rooms, studios, cages or smaller areas, set Parent location to the site/building they live under.
Once your first branch is in place, you can gradually move more locations into the hierarchy and keep your inventory aligned with how your physical spaces are actually laid out.
Ready to try Shelf?
Put what you're learning into practice. Free plan available — no credit card required.